Corkscrew
By Amanda Turner
Happy Holidays Everyone! I thought this would be a great time to review and clean up Corkscrew. I love Corkscrew, it is a teacher's dream - it can be modified, it can be progressed, it can be done on several different pieces of apparatus and that all around keeps the exercise fresh and exciting.
Let’s start with the basics:
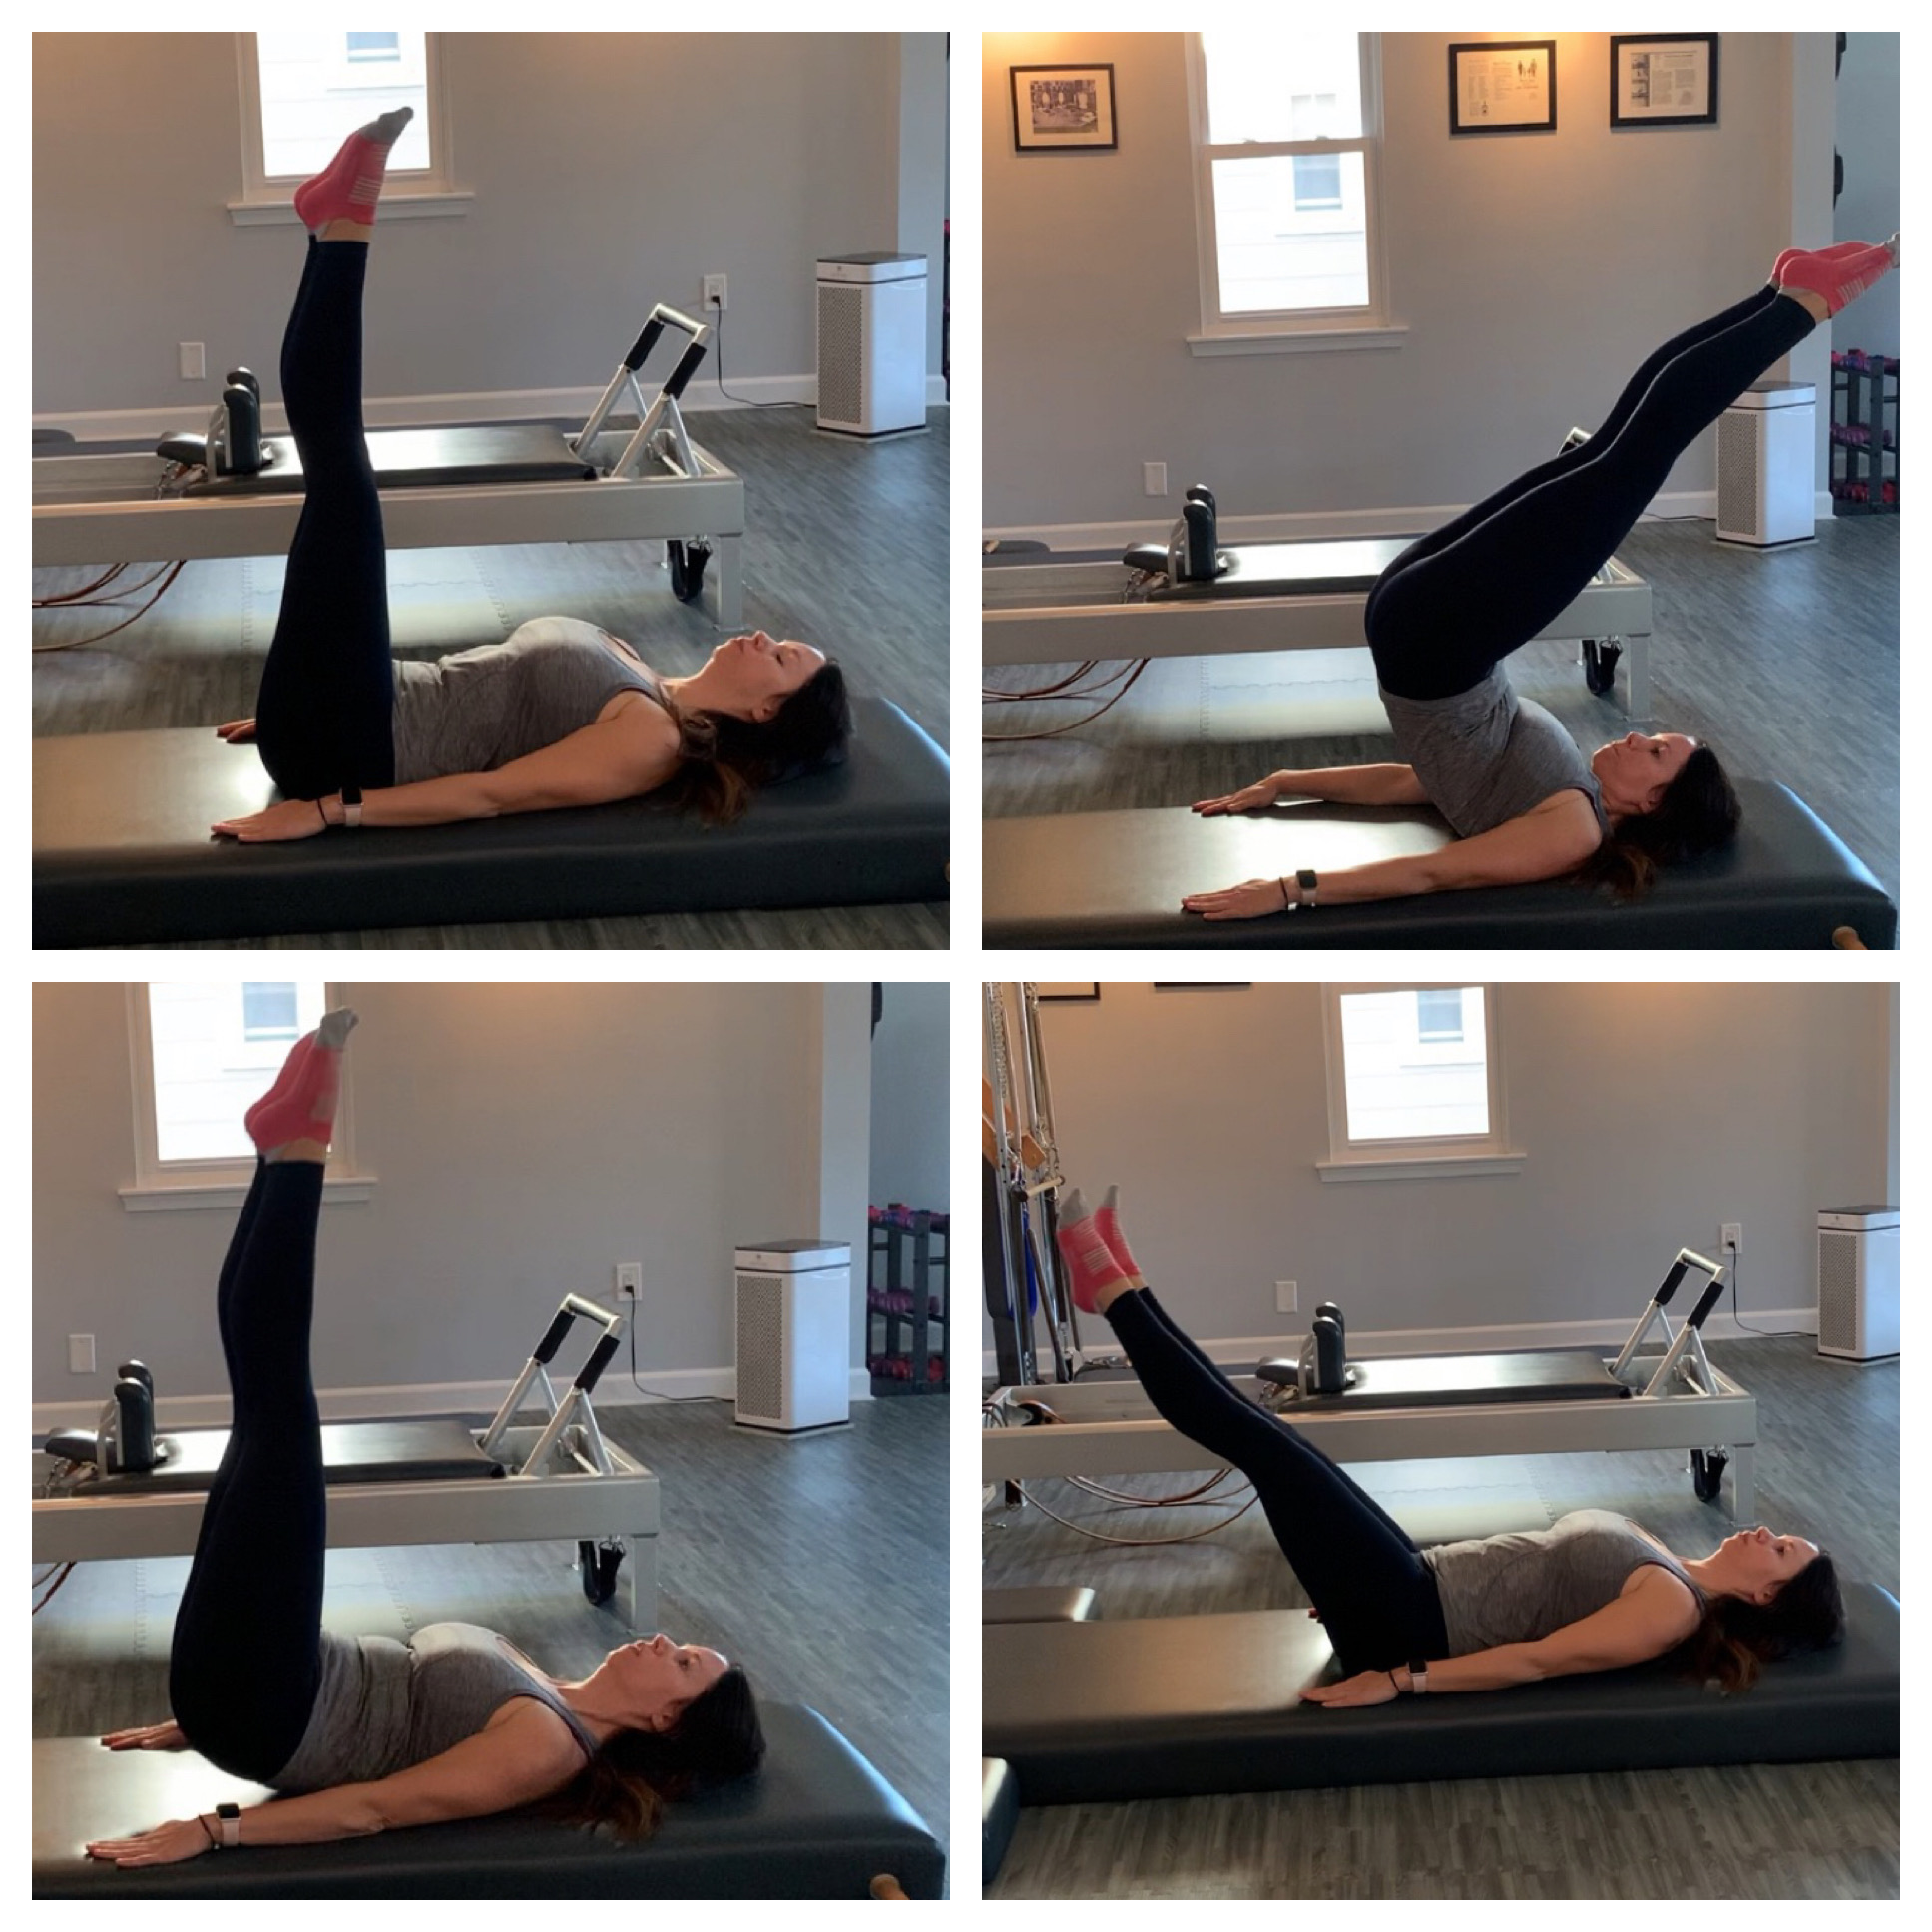
1.) After Open Leg Rocker, bring the legs together, and using control, walk the hands down the legs so that you are now lying on the Mat with your legs toward the ceiling.
2.) Pressing your arms down into the mat, squeezing the legs together, heels together toes a part. Inhale, circle the legs to the right, down and around to the left, exhaling as you return to center. Reverse. Repeat for 3 sets total. Shoulders and wrists stay anchored, legs stay the same length - using the glutes and inner thighs a lot!
3.) Upon completion of your 3 sets, with control, rock yourself up to seated legs and arms landing in your Saw position (legs are straight, wider than the hips, and arms are wide and to the side).
The size of your circle is dependent on being able to keep your scoop. Smaller for more beginner level; bigger for more advanced.
Need to modify for tight hamstrings or low back issues?
Hands can go underneath of the hips and you can also soften the knees, bending them into a diamond shape.
Ready to take it up a notch?
Try adding a hip lift as you return the legs back to center, lifting the hips just an inch is enough.
Other places you can do your corkscrew include the Wunda Chair (my personal favorite) or the Reformer.
Want to strengthen your Corkscrew?
Work on:
~Single Leg Circles
~Stomach Massage Series
~Leg Circles and Frog on Reformer
Where does your Corkscrew take you?
~Hip Circles
~Roll Over
~Jackknife
Comments
Post a Comment